Setting Up a Pi-hole with WireGuard on an Always Free Oracle Cloud VM
Setting Up a Pihole with Wireguard on an Always Free Oracle Cloud VM#
About a week ago, I discovered that Oracle Cloud offers a free tier of virtual machines—not in the AWS “free for a year” sense, but free indefinitely (allegedly). The x86 instances come with 1GB of RAM and 1 vCPU, which isn’t much, but it’s enough for some basic workloads. I like to think of it as a Raspberry Pi Zero in the cloud.
Naturally, I started wondering what I could do with one of these, and the idea of setting up a cloud-hosted Pi-hole came to mind—an interesting little project.
Securing the Resolver#
Of course, running an open DNS resolver on the public internet is a terrible idea. If left unprotected, someone will eventually find it and abuse it for DNS amplification attacks. So, I needed a way to secure the connection between my home network and the Pi-hole in the cloud.
One option would be to restrict access using Oracle Cloud’s networking rules, only allowing connections from my home IP. But I’m on residential internet, and while my IP doesn’t change often, it could change, and I don’t want to deal with the hassle when that happens—DNS is critical infrastructure after all.
I also considered using Pi-hole’s and Unbound’s built-in access controls, but I don’t want this VM accessible publicly at all. Even if it only refuses unauthorized queries, just exposing it could impact its performance—and with just 1GB of RAM and 1 vCPU, there isn’t much power to spare.
So I landed on WireGuard, exposing only port 51820. This approach keeps things simple while securing all DNS traffic inside an encrypted tunnel—a solid solution.
Instance Set Up#
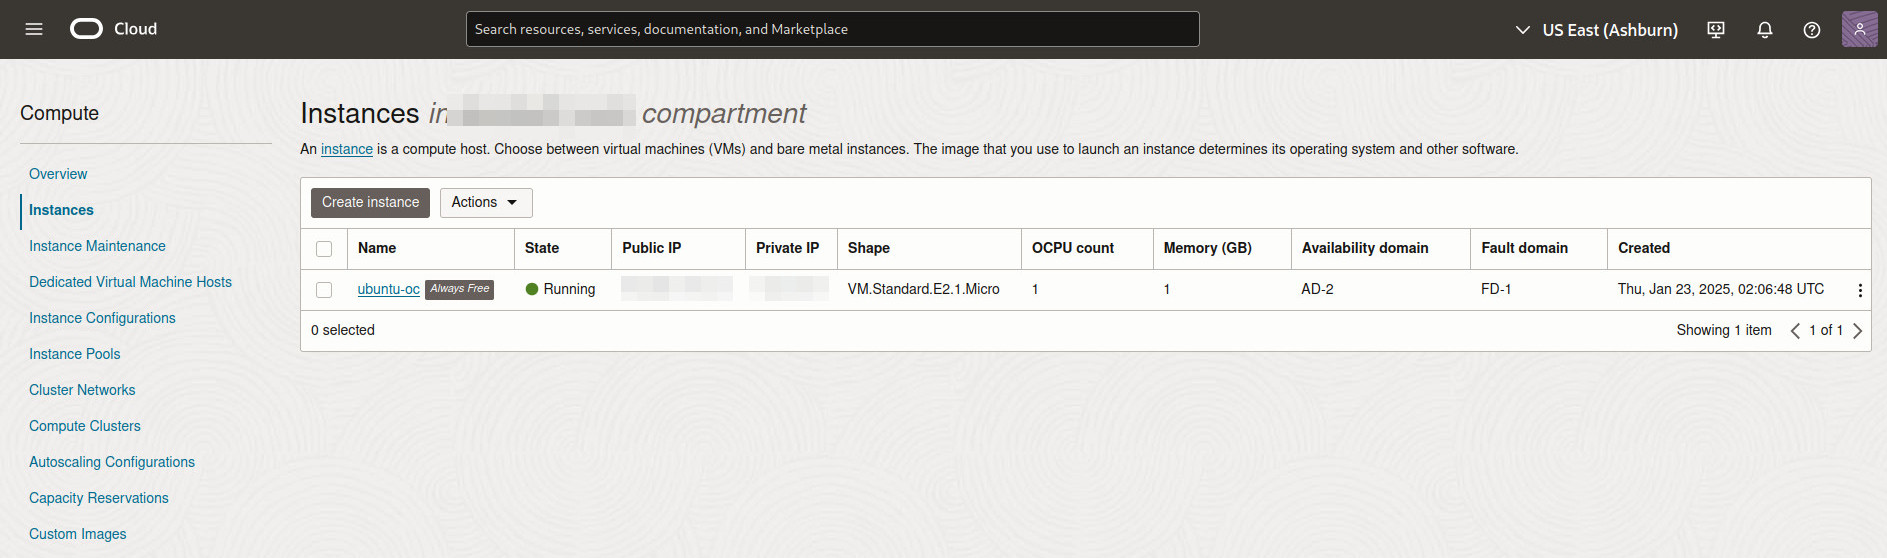
To create an “always free” VM, follow these steps in the Oracle Cloud Console.
- Click the hamburger menu (☰) in the top-left corner and go to Instances.
- Click Create Instance.
Choose An Image#
Most of the defaults can remain the same.
Change the OS to Ubuntu Minimal (since plain Debian isn’t an option for some reason).
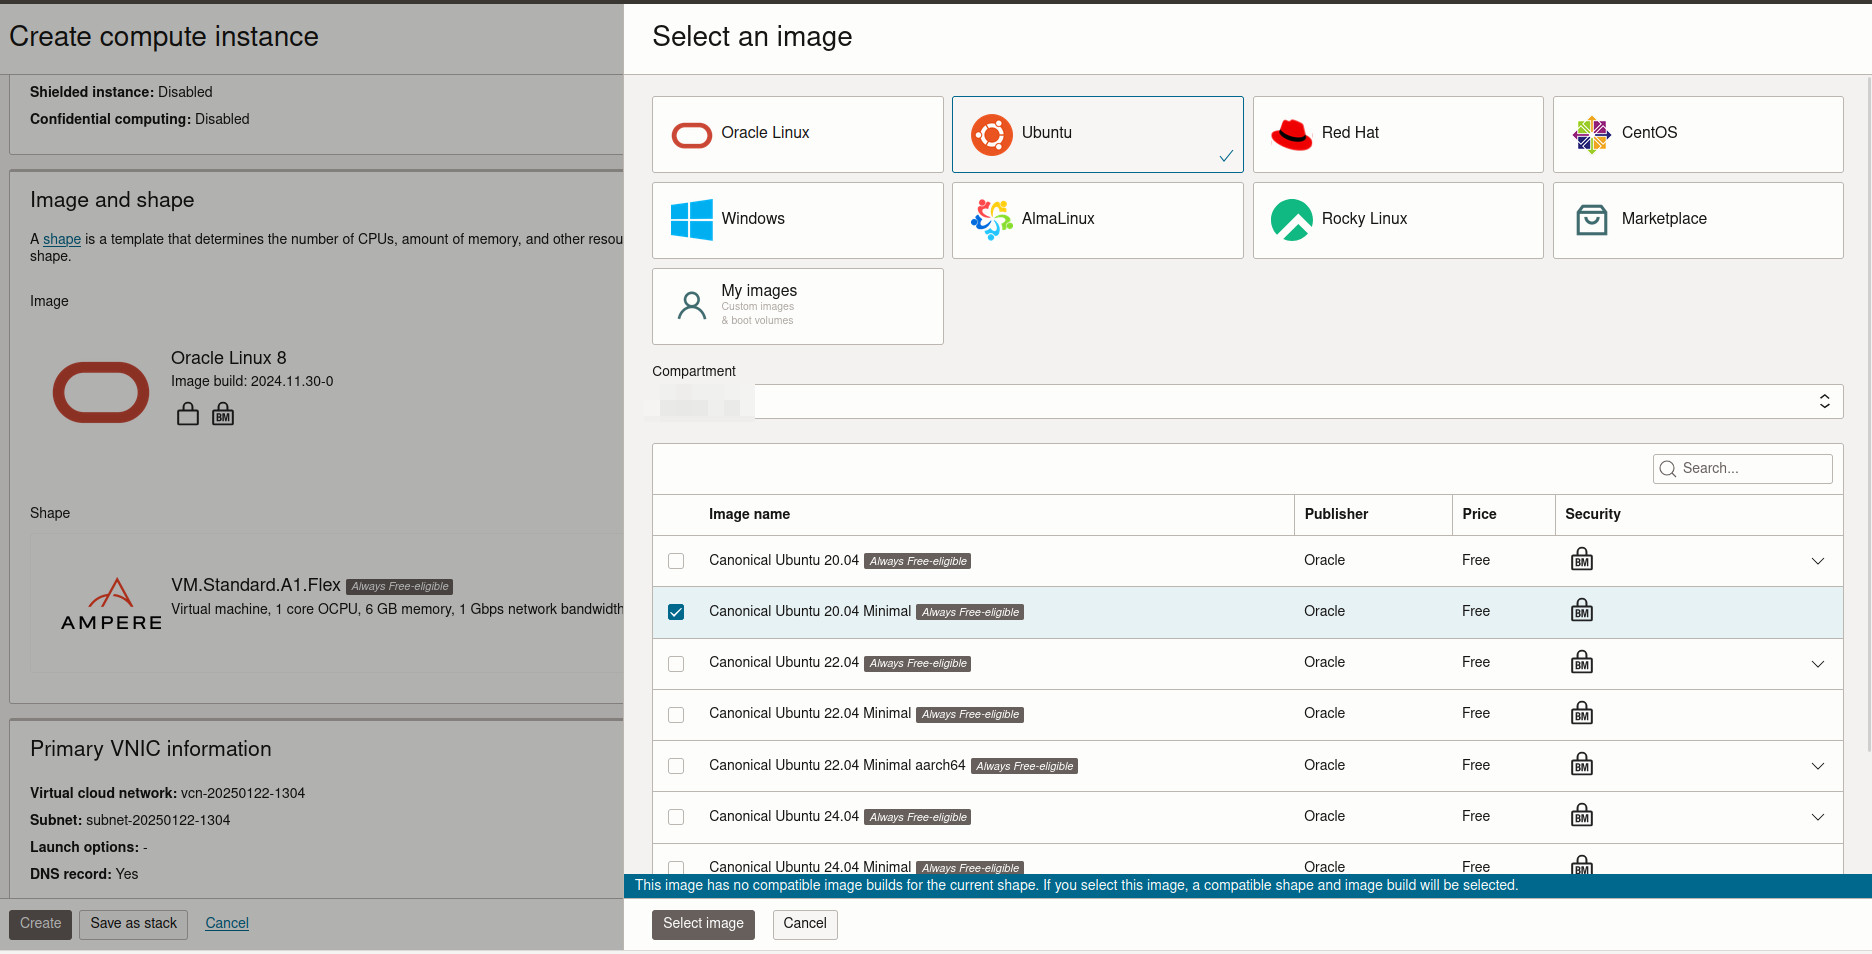
Select A Shape#
- The shape should be
Standard.A1.Flex. - Make sure it says “Always Free Eligible”.
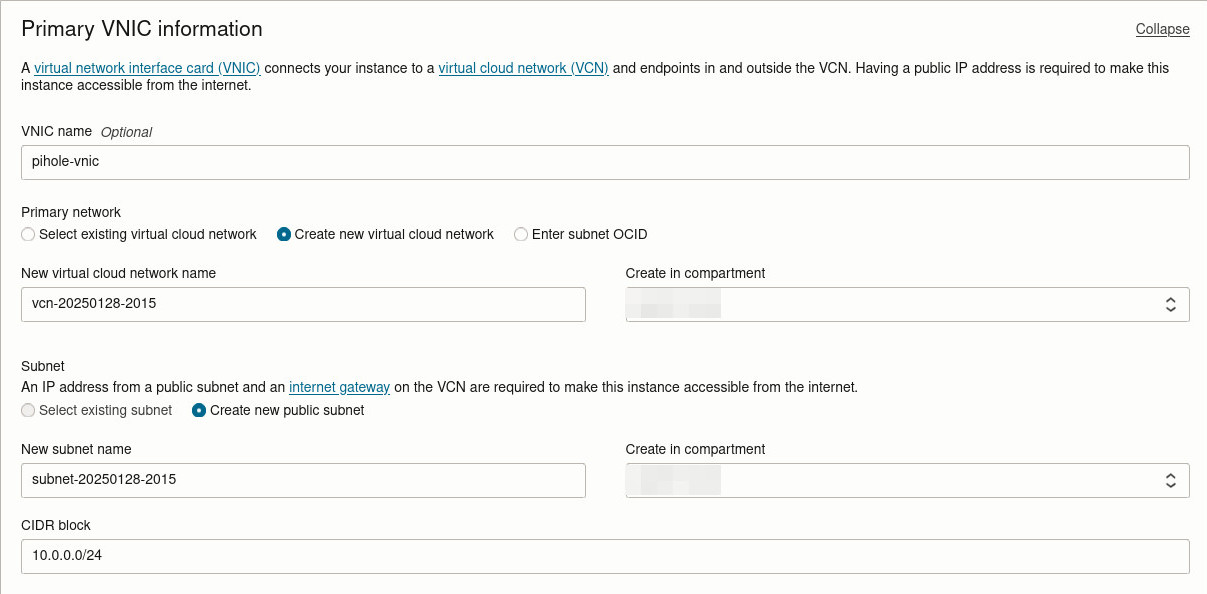
Configure Networking#
If this is your first instance, just use the default VNIC.
Otherwise, create a new VNIC.
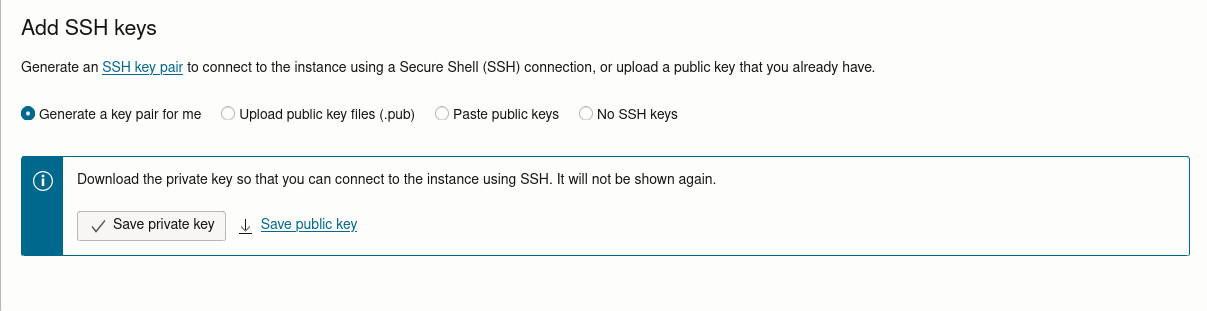
Download your SSH key.#
Download the private key file—you’ll need this to log in.
Accessing the Instance#
Once your Oracle Cloud instance is running, you can SSH into it from your local machine.
Set Up Your SSH Key (Linux)#
First, adjust the key’s permissions and move it to your SSH directory:
chmod 600 ~/Downloads/your-key.pem
mv ~/Downloads/your-key.pem ~/.ssh/ubuntu-pihole.key
Create an SSH Alias (Optional)#
To make connecting easier, add an alias to your ~/.ssh/config file:
Host ubuntu-pihole
  HostName <your-instance-ip>
  User ubuntu
  IdentityFile ~/.ssh/ubuntu-pihole.key
Connect to the Instance#
Now, you can simply run:
ssh ubuntu-pihole
Setting Up Dependencies#
Once connected to your VM, update the system:
sudo apt update && sudo apt full-upgrade -y
Add Docker Sources#
Follow the official Docker Ubuntu installation guide, or use these summarized steps:
sudo apt-get install ca-certificates curl
sudo install -m 0755 -d /etc/apt/keyrings
sudo curl -fsSL https://download.docker.com/linux/ubuntu/gpg -o /etc/apt/keyrings/docker.asc
sudo chmod a+r /etc/apt/keyrings/docker.asc

echo \
  "deb [arch=$(dpkg --print-architecture) signed-by=/etc/apt/keyrings/docker.asc] https://download.docker.com/linux/ubuntu \
  $(. /etc/os-release && echo "$VERSION_CODENAME") stable" | \
  sudo tee /etc/apt/sources.list.d/docker.list > /dev/null

sudo apt-get update
Install Docker#
sudo apt-get install docker-ce docker-ce-cli containerd.io docker-buildx-plugin docker-compose-plugin
Configure Docker to Start on Boot#
sudo systemctl enable docker.service
sudo systemctl enable containerd.service
Add Your User to the Docker Group#
This allows you to run docker commands without sudo:
sudo usermod -aG docker $USER
Then, log out and back in for the group changes to apply.
Verify the Installation#
Run:
docker ps
If Docker is correctly installed, it should run without requiring sudo.
Installing WireGuard, Pihole and Unbound#
Disable systemd-resolved#
Since systemd-resolved listens on port 53, it can interfere with Pi-hole. Disable it and set a public resolver (like Cloudflare) in /etc/resolv.conf:
sudo systemctl disable --now systemd-resolved
sudo rm /etc/resolv.conf
echo "nameserver 1.1.1.1" | sudo tee /etc/resolv.conf
Then restart Docker:
sudo systemctl restart docker
Set Up Your Docker Environment#
Create a directory for your stack:
mkdir ~/pihole-stack && cd ~/pihole-stack
Create blank configuration files for Unbound:
mkdir -p ./etc-unbound
touch ./etc-unbound/a-records.conf ./etc-unbound/srv-records.conf ./etc-unbound/forward-records.conf
Create the docker-compose.yml File#
Inside ~/pihole-stack, create a new file called docker-compose.yml:
nano docker-compose.yml
Paste the following configuration:
networks:
  dns_net:
    driver: bridge
    ipam:
      config:
        - subnet: 192.168.5.0/24  # Custom subnet for the Docker network

services:
  pihole:
    container_name: pihole
    image: pihole/pihole:latest
    ports:
      - "53:53/tcp"
      - "53:53/udp"
      - "8080:80/tcp"  # Pi-hole Web UI
    environment:
      WEBPASSWORD: 'SOMETHING' # Change this to your desired password
      DNS1: '192.168.5.3'  # Unbound's static IP
      DNS2: '192.168.5.3'
      DNSMASQ_LISTENING: 'all'
      FTLCONF_LOCAL_IPV4: '192.168.5.2'  # Pi-hole's static IP
    volumes:
      - './etc-pihole:/etc/pihole'
      - './etc-dnsmasq.d:/etc/dnsmasq.d'
    restart: unless-stopped
    depends_on:
      - unbound
    networks:
      dns_net:
        ipv4_address: 192.168.5.2  # Static IP for Pi-hole

  unbound:
    container_name: unbound
    image: pedantic/unbound:latest
    volumes:
      - './etc-unbound:/opt/unbound/etc/unbound'
    restart: unless-stopped
    networks:
      dns_net:
        ipv4_address: 192.168.5.3  # Static IP for Unbound

  wireguard:
    container_name: wireguard
    image: linuxserver/wireguard
    cap_add:
      - NET_ADMIN
      - SYS_MODULE
    environment:
      PUID: 1000
      PGID: 1000
      TZ: Etc/UTC
      SERVERPORT: 51820
      PEERS: 1
      PEERDNS: 192.168.5.2  # Pi-hole as DNS resolver
      INTERNAL_SUBNET: 10.6.0.0/24
    volumes:
      - './config:/config'
      - '/lib/modules:/lib/modules'
    ports:
      - "51820:51820/udp"
    sysctls:
      - net.ipv4.conf.all.src_valid_mark=1
    restart: unless-stopped
    depends_on:
      - pihole
    networks:
      dns_net:
        ipv4_address: 192.168.5.4
Note: The Pi-hole web interface will only be accessible through WireGuard.
Start the Containers#
Run:
docker compose up -d
Once everything is running, check the logs for any errors:
docker compose logs -f
Test DNS Resolution#
Install dnsutils if it’s not already installed:
sudo apt install dnsutils -y
Now, test if Pi-hole is resolving queries:
dig @127.0.0.1 www.google.com
If everything is working, you should see output like this:
; <<>> DiG 9.18.30-0ubuntu0.20.04.1-Ubuntu <<>> @127.0.0.1 www.google.com
; (1 server found)
;; global options: +cmd
;; Got answer:
;; ->>HEADER<<- opcode: QUERY, status: NOERROR, id: 19037
;; flags: qr rd ra; QUERY: 1, ANSWER: 6, AUTHORITY: 0, ADDITIONAL: 1

;; OPT PSEUDOSECTION:
; EDNS: version: 0, flags:; udp: 1232
;; QUESTION SECTION:
;www.google.com.			IN	A

;; ANSWER SECTION:
www.google.com.		300	IN	A	142.251.179.106
www.google.com.		300	IN	A	142.251.179.105
www.google.com.		300	IN	A	142.251.179.103
www.google.com.		300	IN	A	142.251.179.104
www.google.com.		300	IN	A	142.251.179.147
www.google.com.		300	IN	A	142.251.179.99

;; Query time: 176 msec
;; SERVER: 127.0.0.1#53(127.0.0.1) (UDP)
;; WHEN: Wed Jan 29 03:24:26 UTC 2025
;; MSG SIZE  rcvd: 139
Enable Logging in Unbound#
To verify that queries sent to Pi-hole are being properly forwarded to Unbound, we need to enable logging.
Edit the Unbound Configuration#
Open Unbound’s config file:
nano ./etc-unbound/unbound.conf
Add/modify the following directives:
server:
    verbosity: 3  # Increase logging verbosity (0-5, where 5 is the most detailed)
    log-queries: yes
    log-replies: yes
    log-servfail: yes
    logfile: "/opt/unbound/etc/unbound/unbound.log"
Restart the Stack#
Restart your Docker containers to apply the changes:
docker compose down && docker compose up -d
Verify Queries Are Routed Through Unbound#
Run a dig query against 127.0.0.1:
dig @127.0.0.1 facebook.com
Then check the Docker logs:
docker compose logs -f
unbound    | [1738122055] unbound[1:0] info: iterator operate: query facebook.com. DS IN
unbound    | [1738122055] unbound[1:0] info: response for facebook.com. DS IN
unbound    | [1738122055] unbound[1:0] info: reply from <com.> 192.12.94.30#53
unbound    | [1738122055] unbound[1:0] info: query response was nodata ANSWER
unbound    | [1738122055] unbound[1:0] info: finishing processing for facebook.com. DS IN
How It Works#
- Pi-hole is the entry point for DNS queries, listening on port 53.
- If a query is cached or blocked, Pi-hole handles it immediately.
- Otherwise, Pi-hole forwards the query to the Unbound container within the Docker network.
- Unbound performs full recursive DNS resolution.
Connecting to WireGuard#
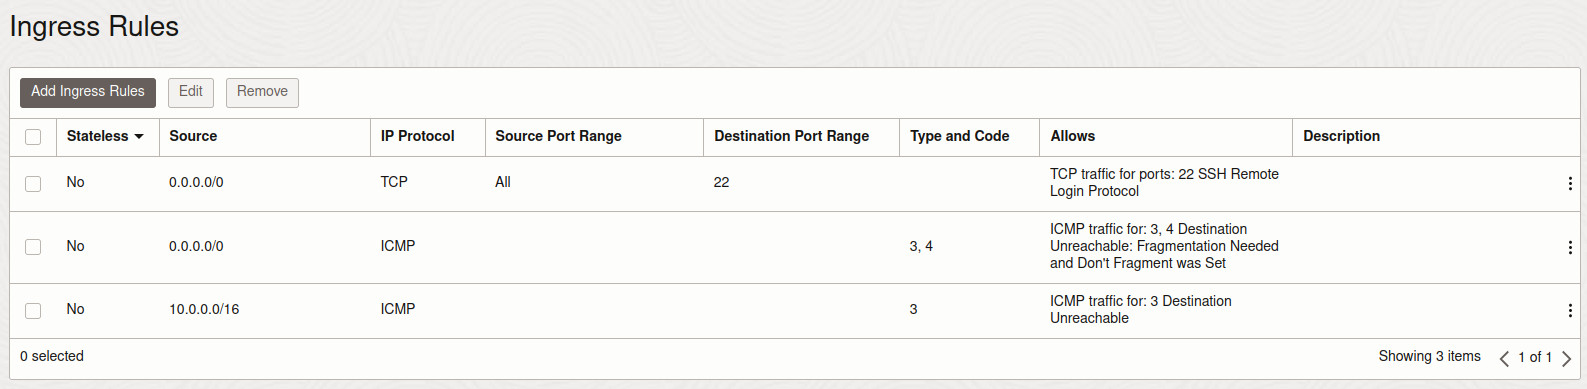
To allow ingress UDP traffic for WireGuard, we need to configure Oracle Cloud’s firewall rules.
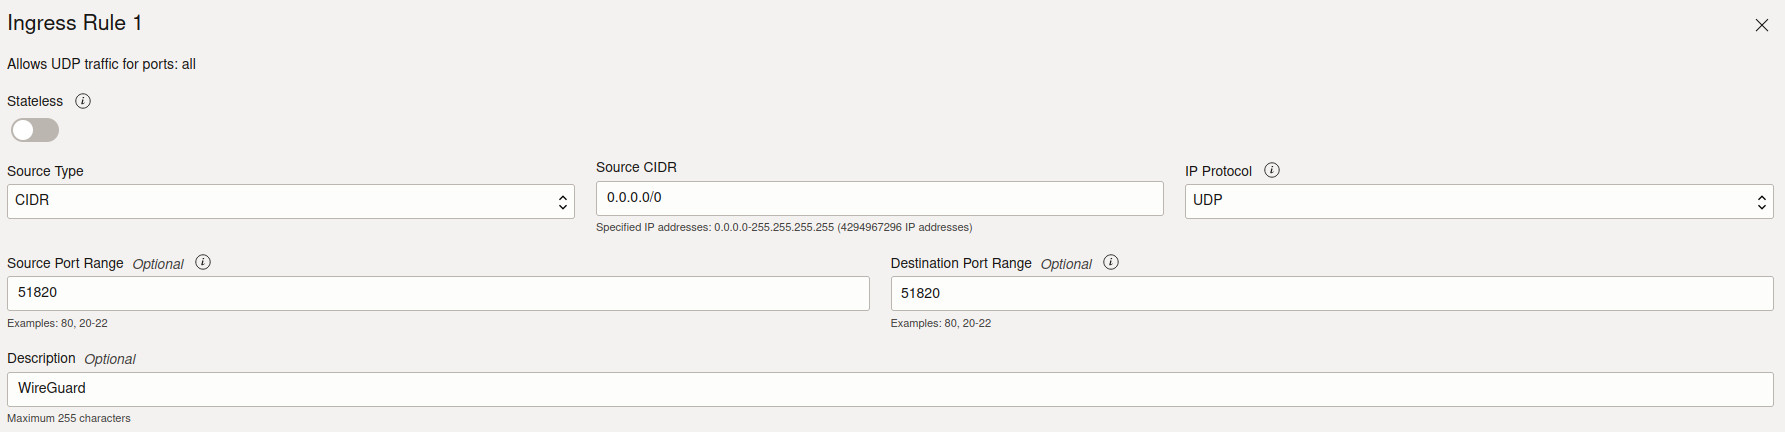
Allow UDP Traffic on Port 51820#
- Go to Instances in the Oracle Cloud Console.
- Click on your Pihole instance.
- Scroll down and click on “Attached VNICs”.
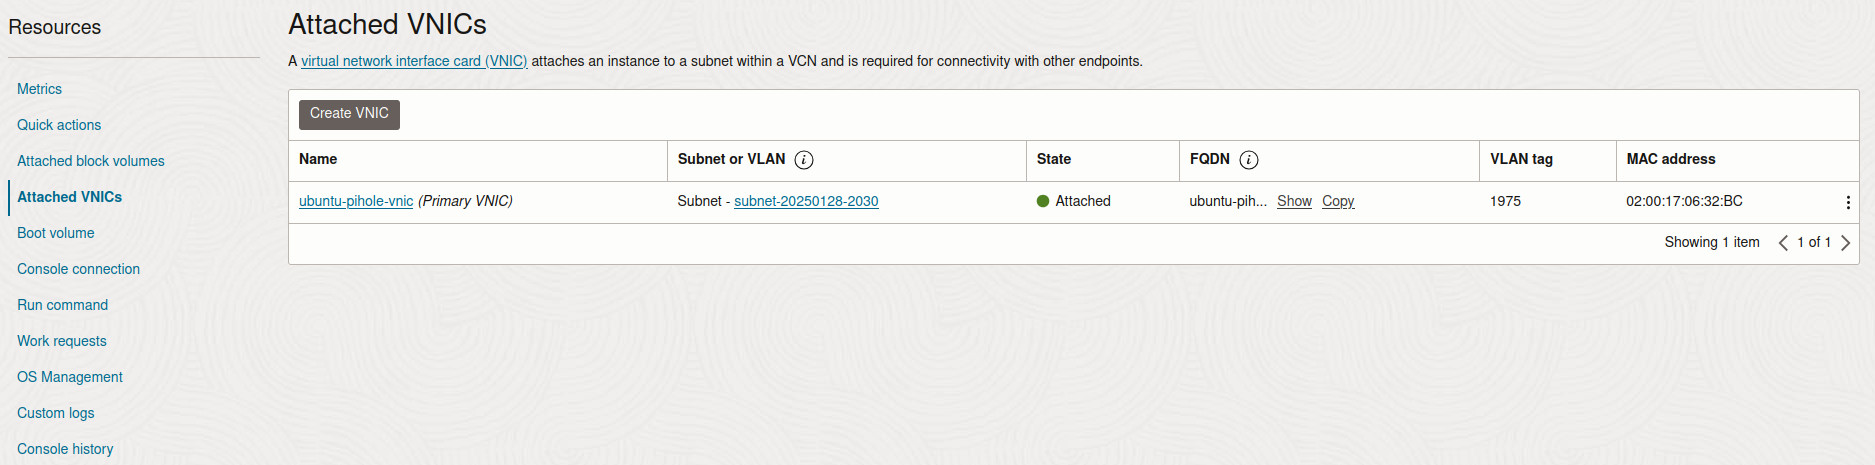
- Click on your subnet.
- Click on your security list

- Add a new ingress rule for UDP traffic on port 51820, allowing connections from 0.0.0.0/0.
Retrieve Your WireGuard Configuration#
Once WireGuard is running, the client configuration file is automatically generated on your VM at:
config/peer1/peer1.conf
To use this configuration on your local machine, copy the file using one of the following methods:
Option 1: Copy via SCP#
Run this command from your local machine:
mkdir ~/.wireguard && \
scp ubuntu-pihole:~/pihole-stack/config/peer1/peer1.conf ~/.wireguard/wg-pihole.conf
Option 2: Manually Copy the Contents#
Alternatively, open the file on your VM:
cat ~/pihole-stack/config/peer1/peer1.conf
Then manually copy the contents and save them to ~/.wireguard/wg-pihole.conf on your local machine.
Example WireGuard Client Configuration#
Your WireGuard client configuration should look something like this:
[Interface]
Address = 10.6.0.2
PrivateKey = redacted
ListenPort = 51820
DNS = 192.168.5.2 # Pi-hole as the DNS server

[Peer]
PublicKey = redacted
PresharedKey = redacted
Endpoint = redacted:51820
AllowedIPs = 0.0.0.0/0, ::/0
Note: The DNS = 192.168.5.2 ensures all DNS traffic is routed through Pi-hole while connected.
Connect to WireGuard#
To enable your connection, use wg-quick. This tool is included in the wireguard-tools package (available via apt or pacman on Linux and brew on macOS).
wg-quick up ~/.wireguard/wg-pihole.conf
Verify the Connection#
If everything is configured correctly, you should now be connected to your VPN and all DNS traffic should be routed through Pi-hole while the connection is active.
To confirm your connection:
wg show
You should see an active session with data being transferred.
To verify that DNS queries are resolving through Pi-hole, run:
dig @192.168.5.2 google.com
If this returns a valid response, your setup is working!
Accessing the Pihole Interface and Testing#
Now that everything is set up, let’s access the Pi-hole web interface and test if it’s working correctly.
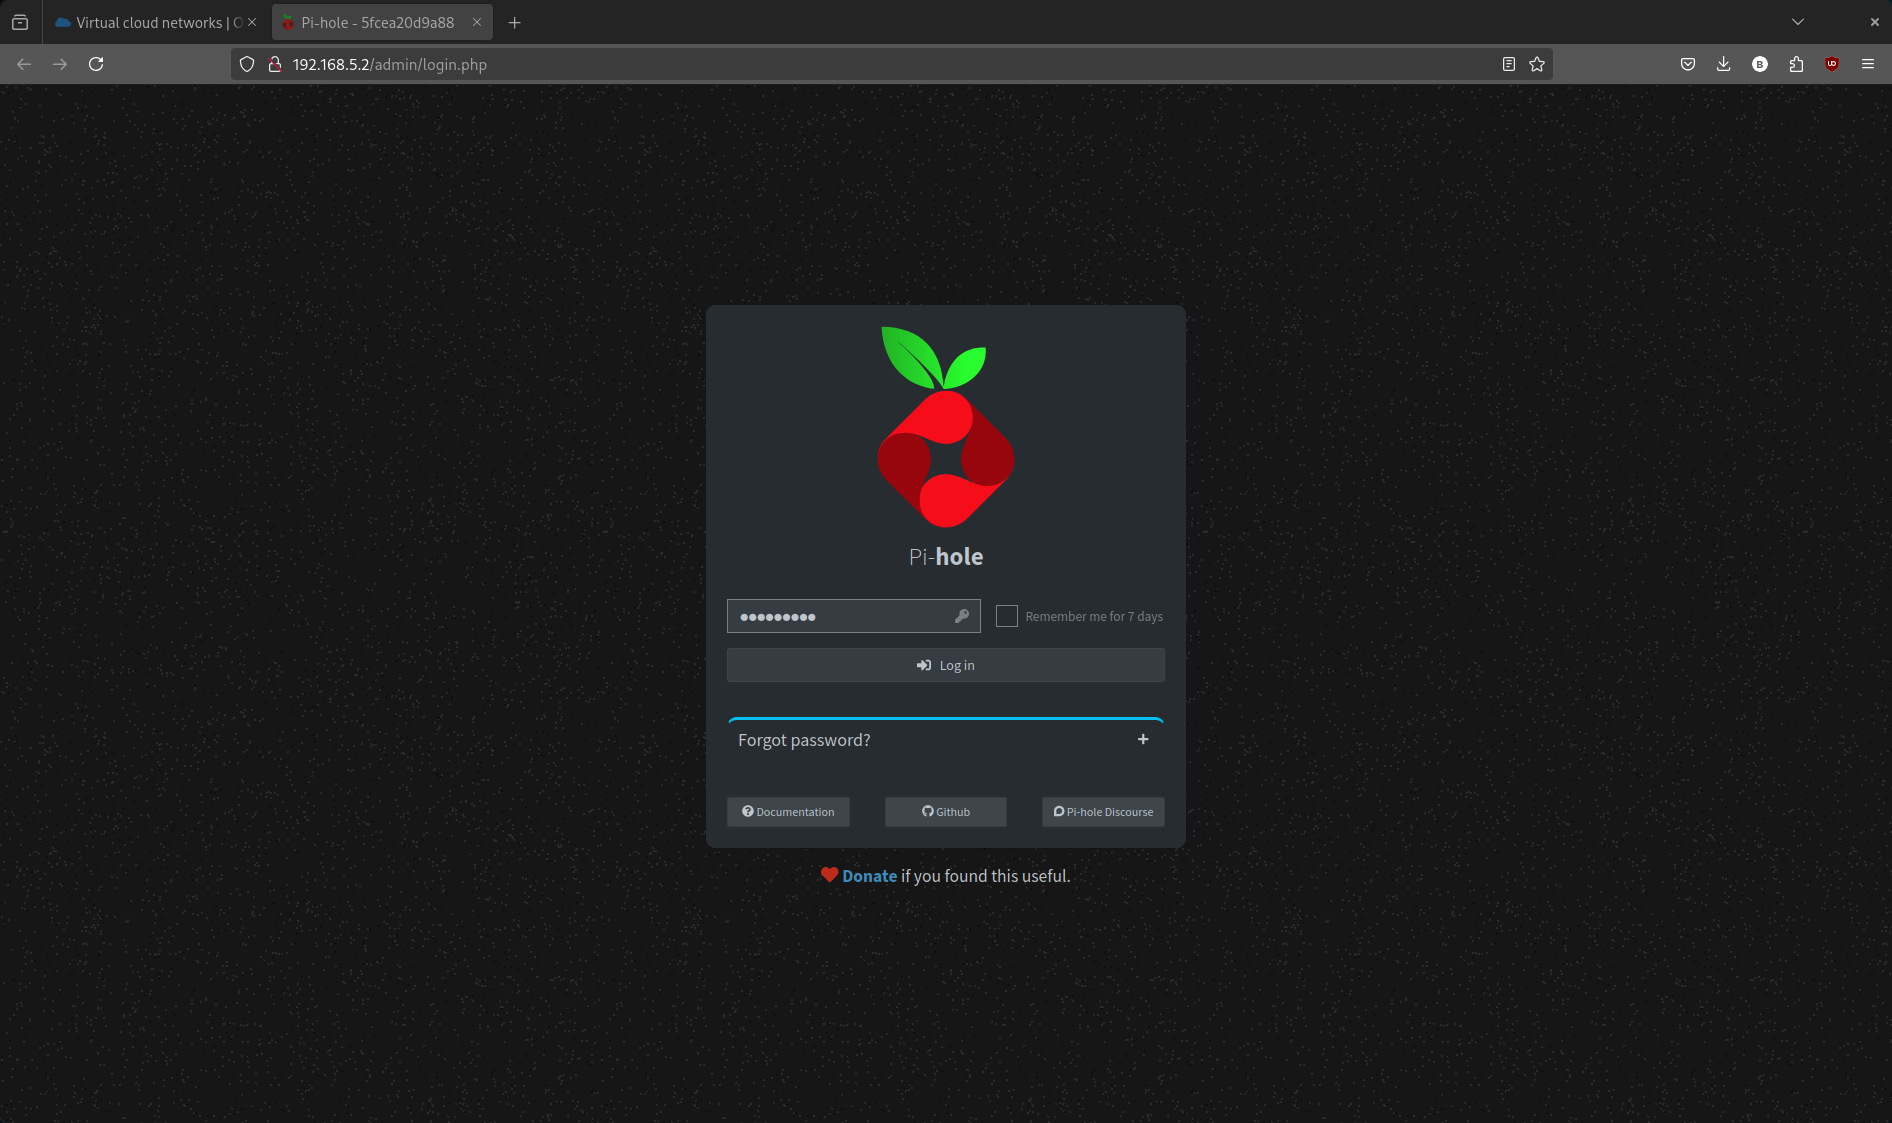
Open the Pi-hole Web Interface#
Since Pi-hole has a static IP inside the Docker network, you can access the web UI at:
http://192.168.5.2
This will take you to the admin login page. Enter the password you set in your docker-compose.yml file.
Explore the Pi-hole Dashboard#
Once logged in, you’ll see real-time DNS activity and other Pi-hole-related settings.
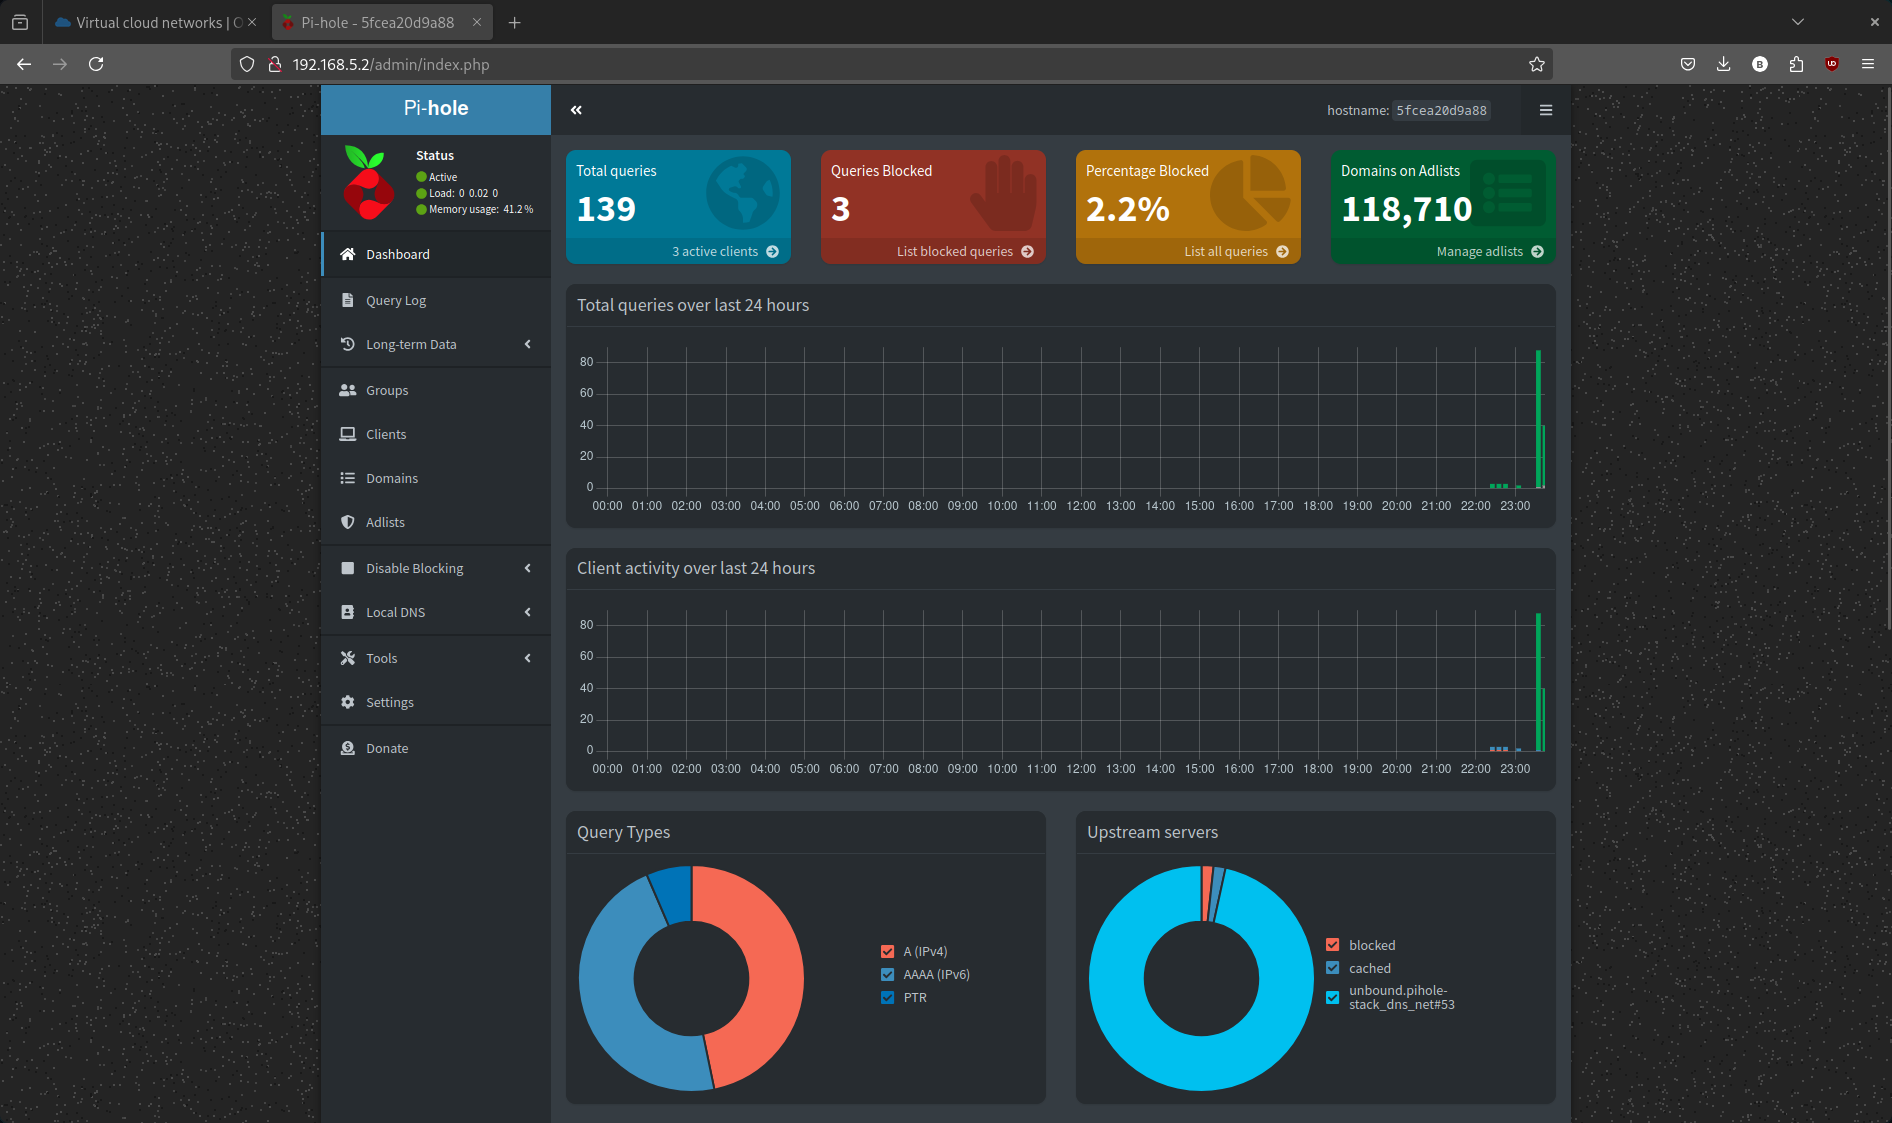
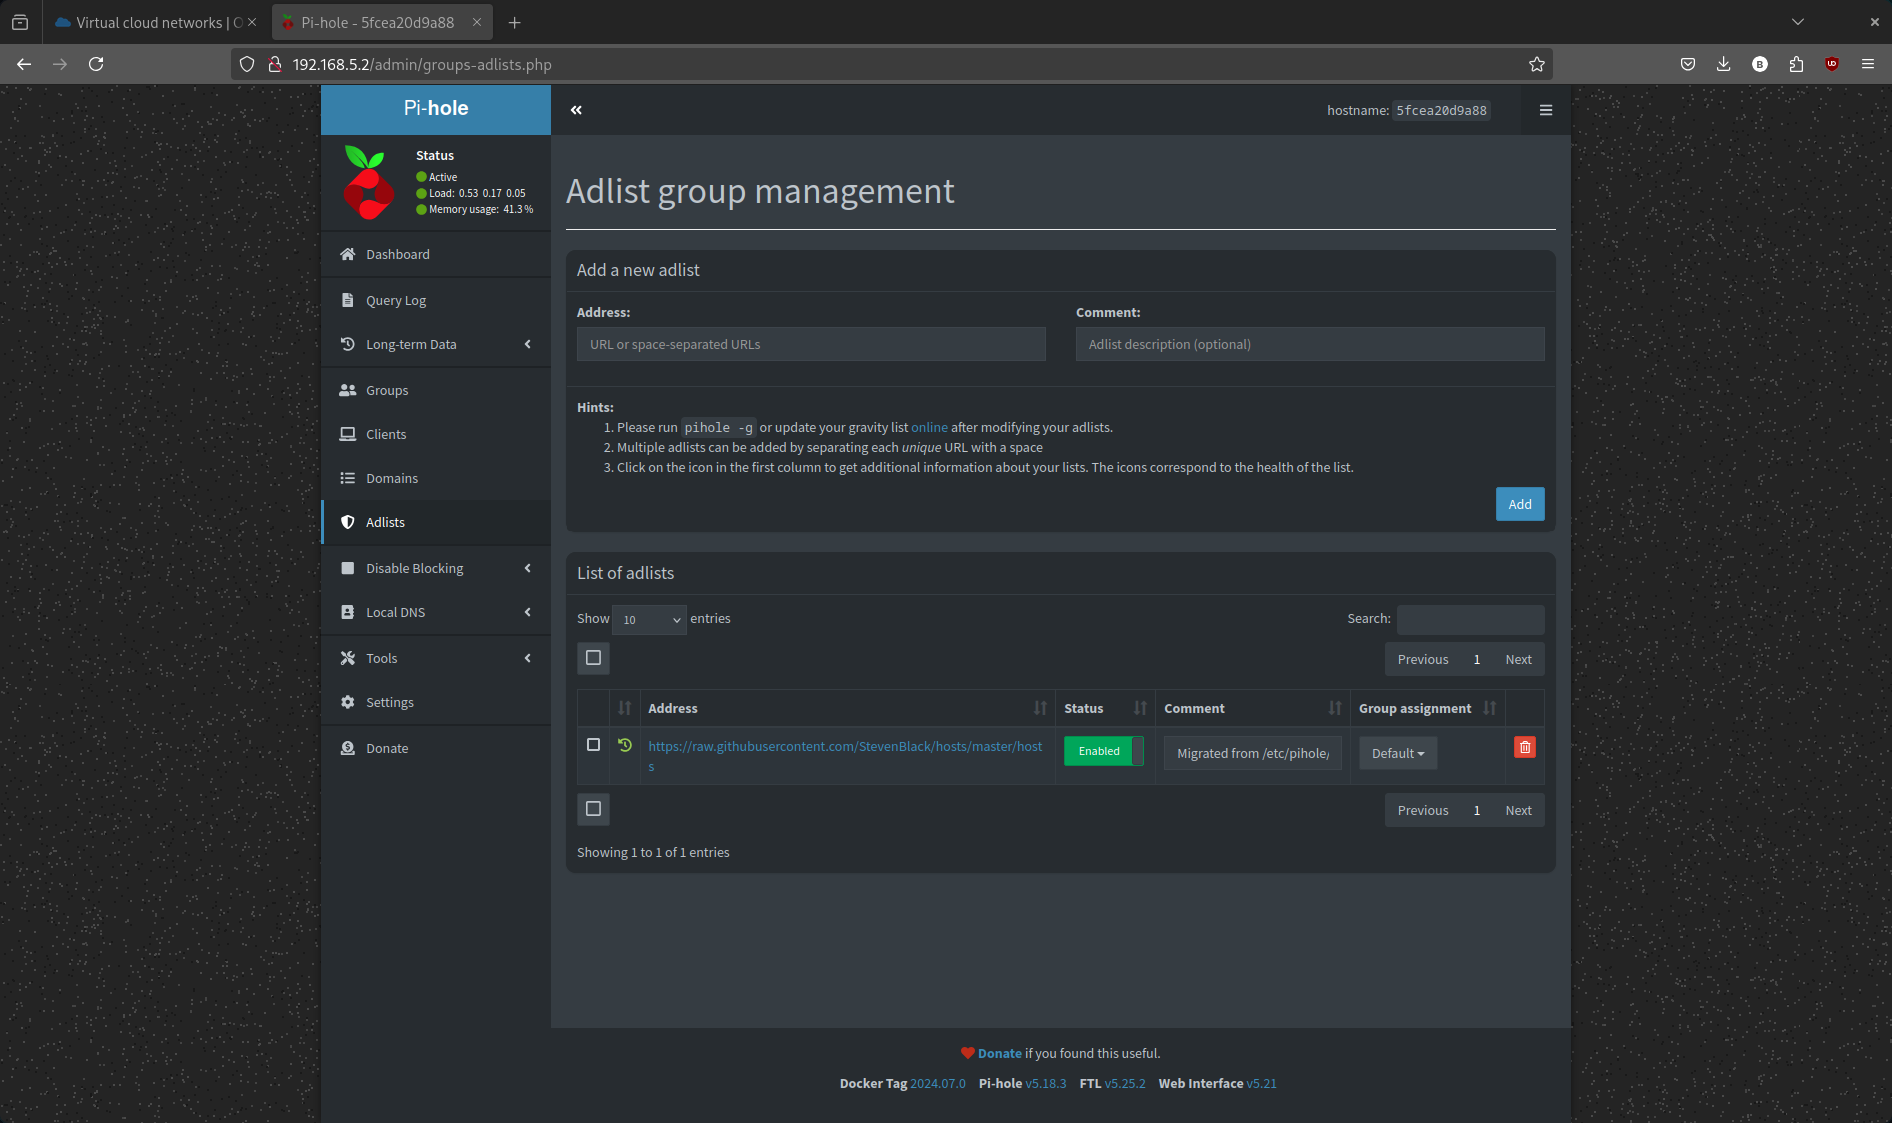
Pi-hole works out of the box with the default adlists.
Verify Unbound as the Upstream Resolver#
Under Settings -> DNS, you should see Unbound’s Docker network IP (192.168.5.3) listed as the upstream DNS resolver.
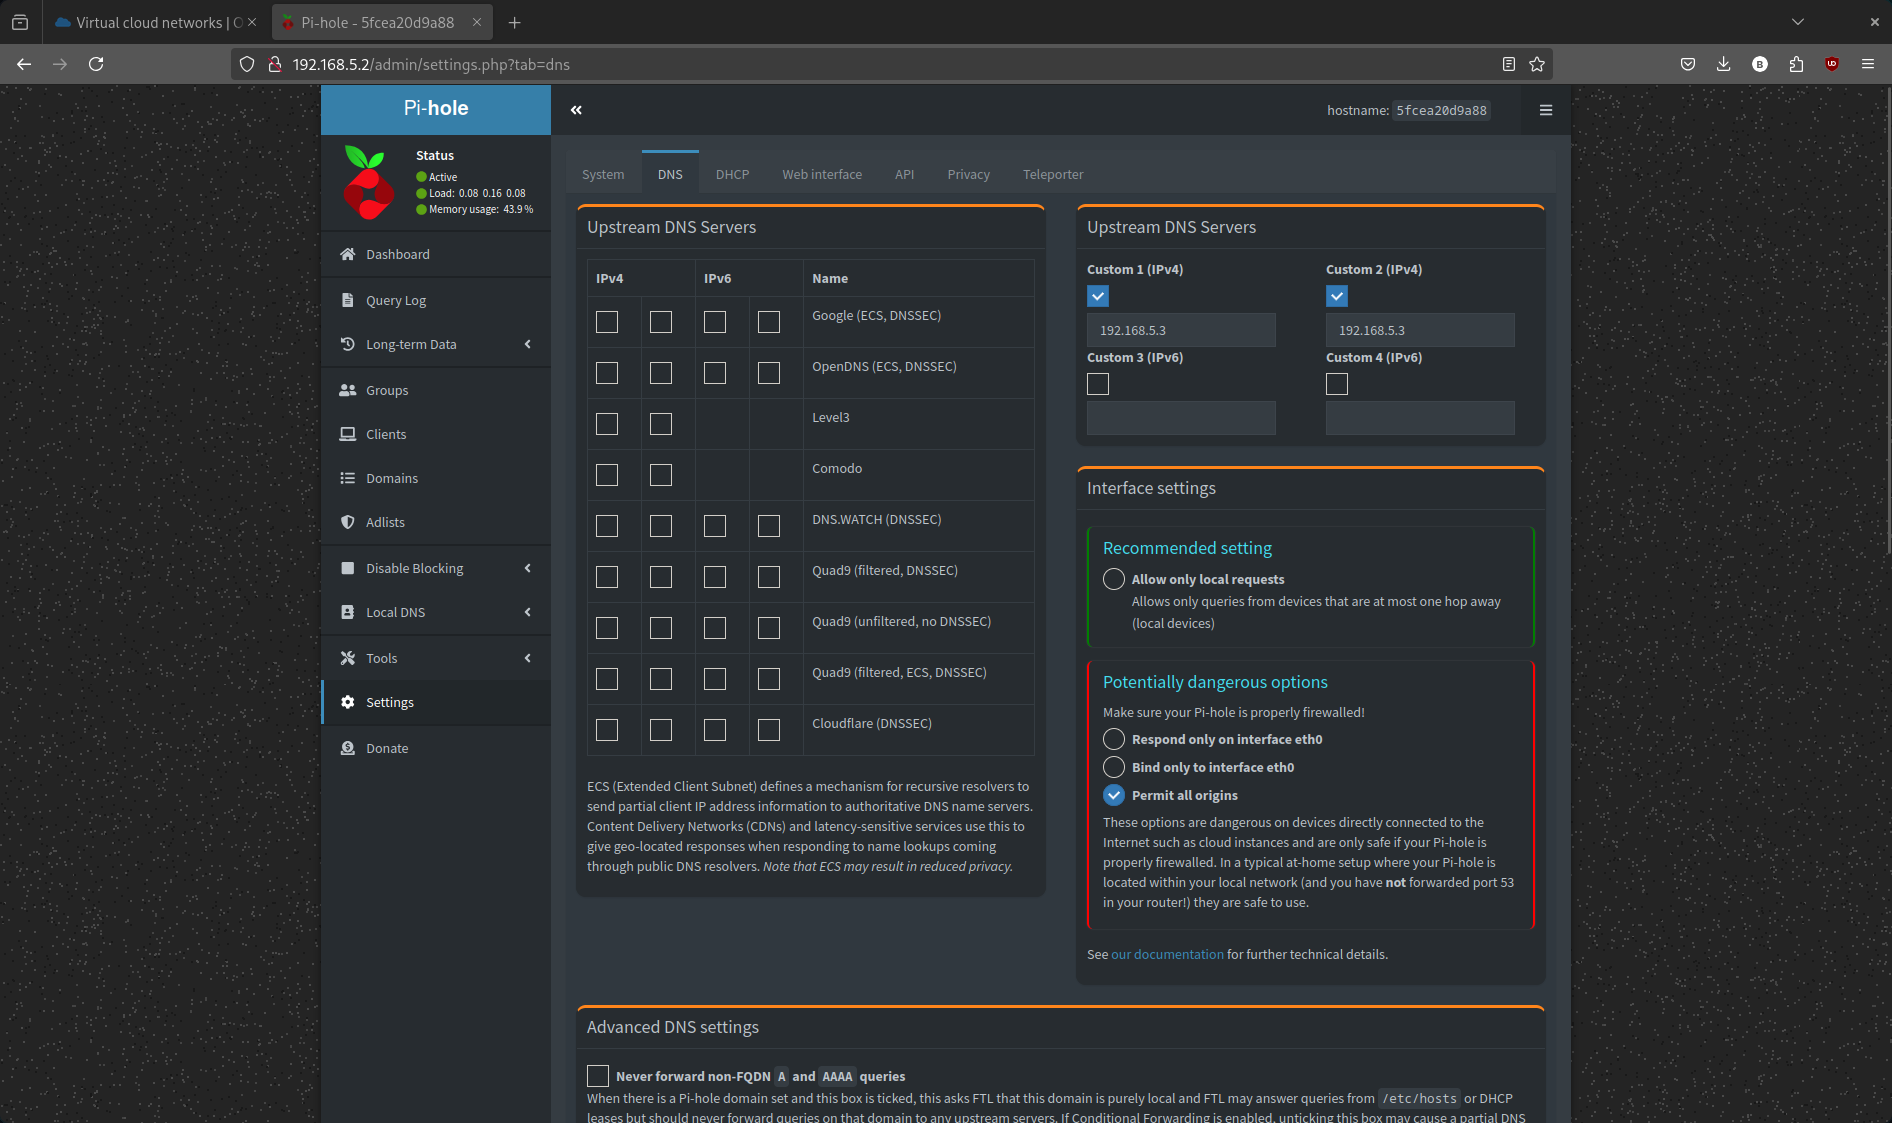
This confirms that Pi-hole is forwarding DNS queries to Unbound instead of an external provider.
Test Domain Blocking#
To confirm that Pi-hole is actively blocking domains, follow these steps:
- In the Pi-hole admin interface, go to Domain Management.
- Add a test domain to the blacklist (e.g., example.com).
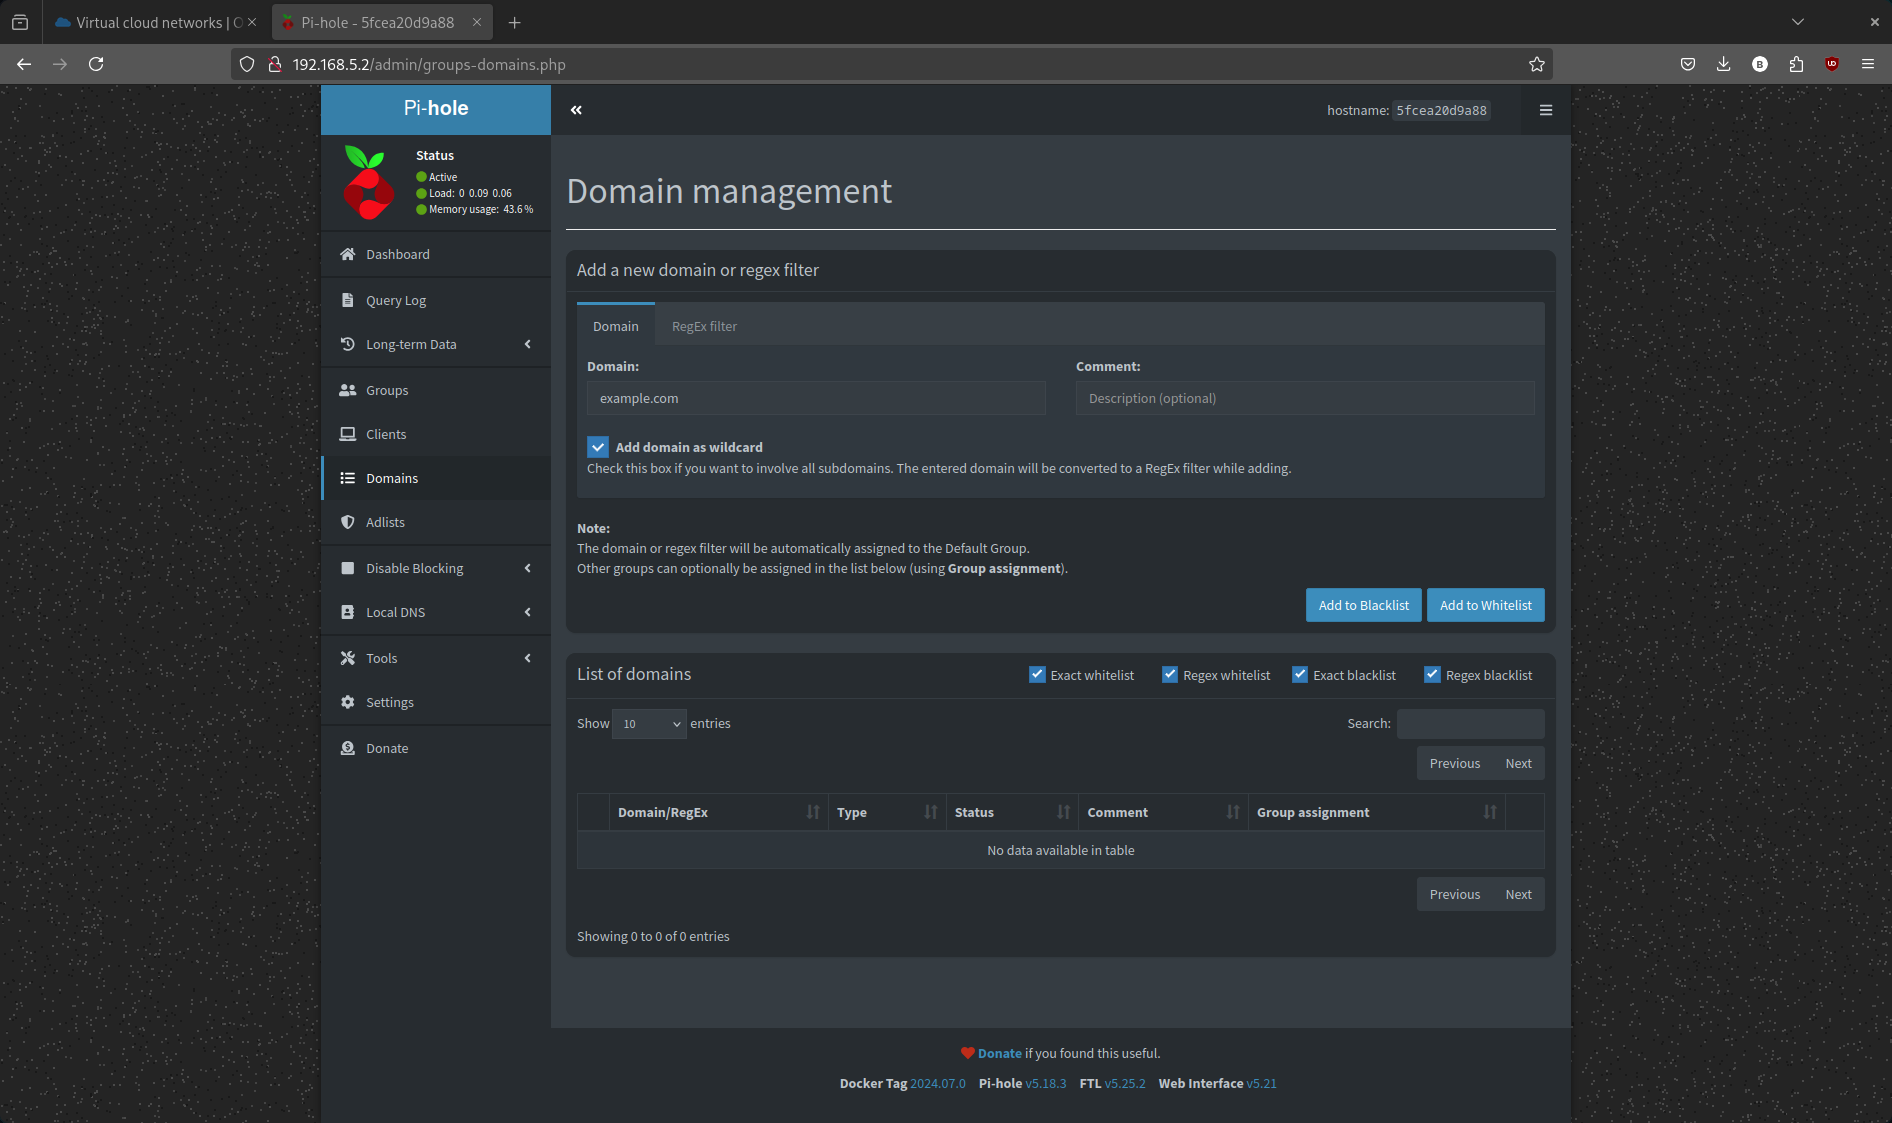
- Now try to go to that domain in your browser.
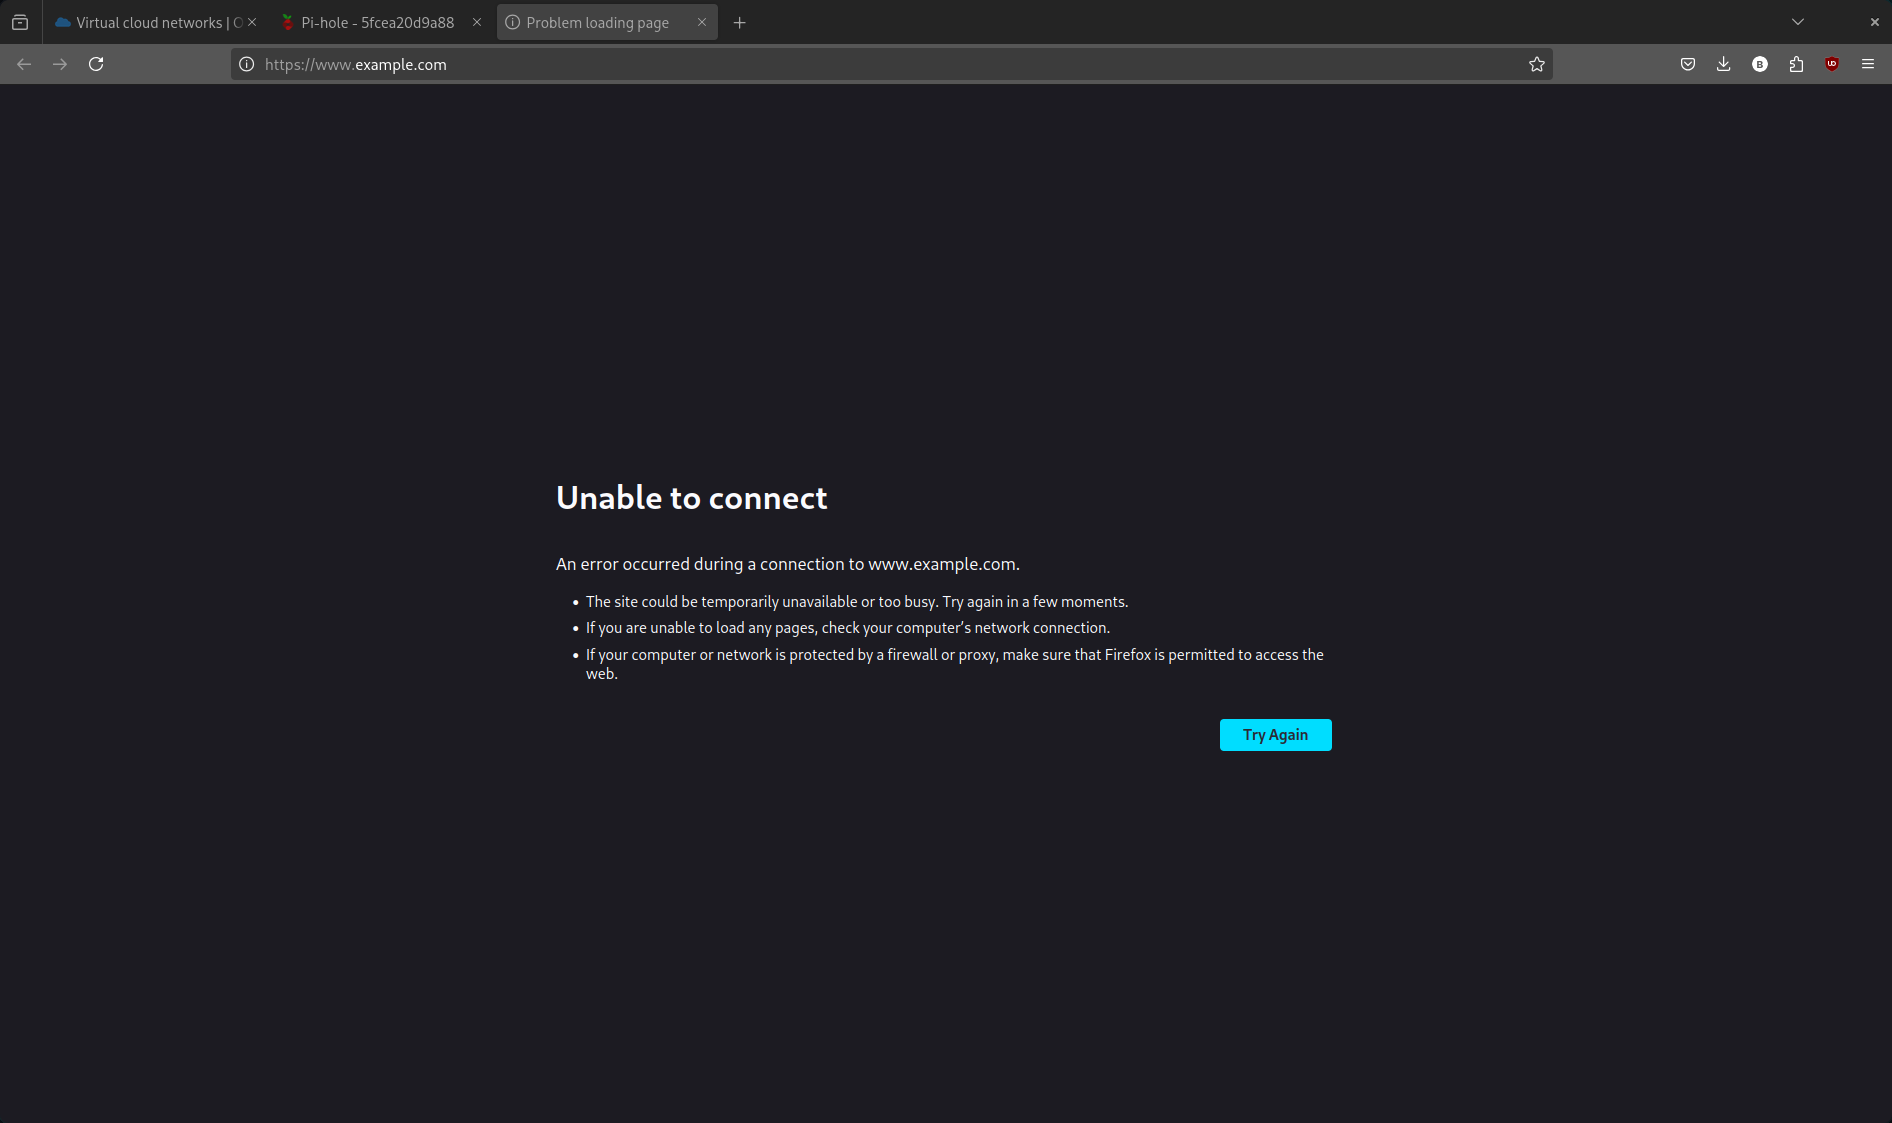
Voila! The request is blocked, meaning Pi-hole is working as expected.
Disabling Logging and Disconnecting From Wireguard#
Disable Unbound Logging (Optional)#
Once you’re done testing, you may want to disable Unbound logging to reduce unnecessary disk writes.
Open the Unbound configuration file:
nano ./etc-unbound/unbound.confEither set logging values to no:
log-queries: no
log-replies: no
log-servfail: no
OR redirect logs to
/dev/null:logfile: "/dev/null"Restart the stack to apply changes:
docker compose down && docker compose up -d
Disconnect from WireGuard#
To disconnect from your WireGuard VPN, simply run:
wg-quick down ~/.wireguard/wg-pihole.conf
This will terminate the VPN connection and restore your default network settings.
That’s It!#
Your Pi-hole + Unbound setup on an Always Free Oracle Cloud VM is now complete!
Thank you for coming to my TED Talk.